Senior Project - A Versatile UAV-Based Object Manipulation and Retrieval Platform
A system consisting of a robotic arm mounted to a UAV. The arm can be controlled programatically through java and python libraries that I wrote, or manually using a leap motion gesture controller. In manual mode, the arm mirrors a users’ gestures in real-time.
Project Description
My high school required a senior project in order to graduate. Two weeks at the end of senior year were set aside for students to explore internships, personal projects, travel experiences, or apprenticeships. I decided to research robotics and autonomous flight by building a robotic mounted to a drone. Under the mentorship of Mr. Noah Donaldson from Annapolis Micro Systems, I set off on designing the robot arm.
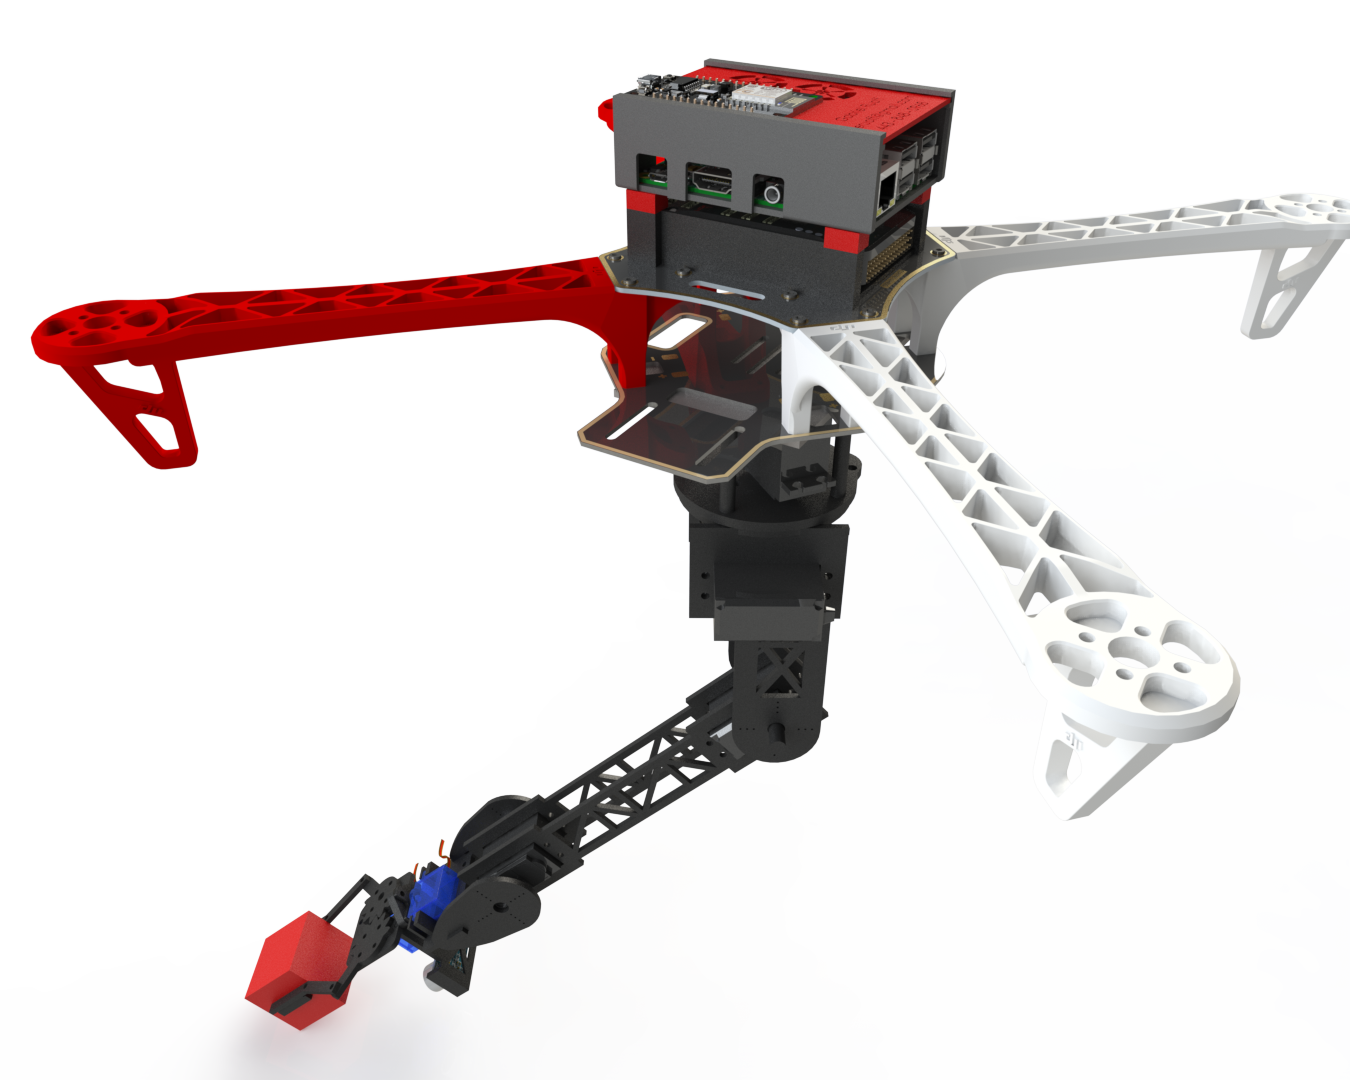
The Arm
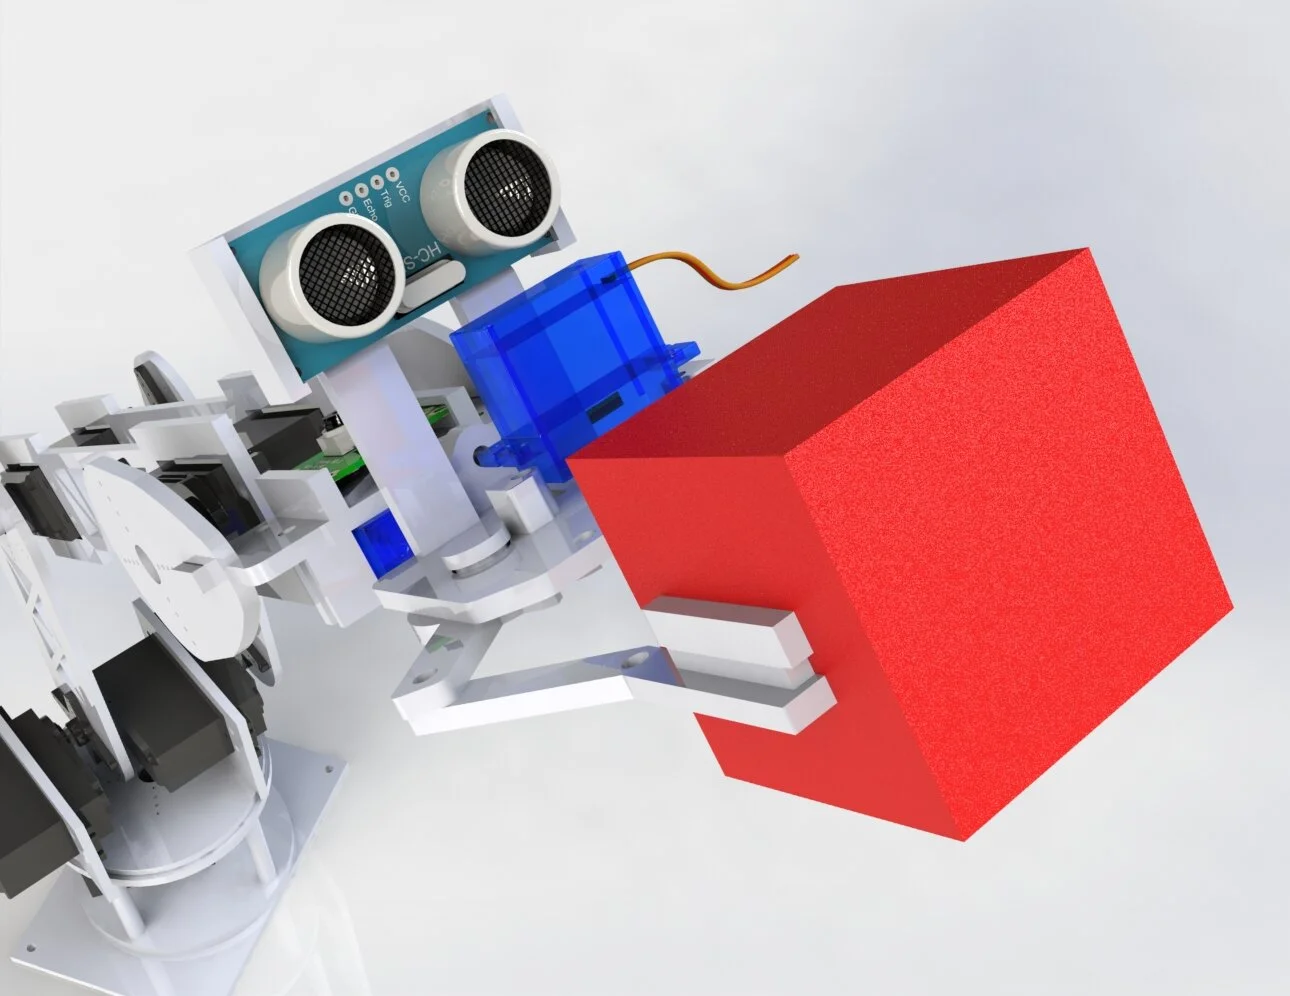
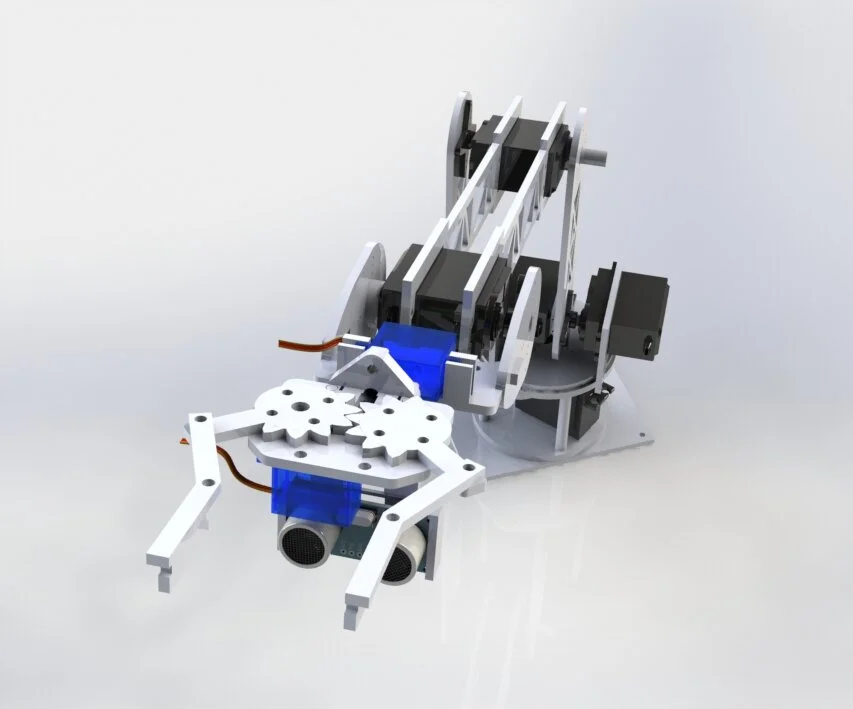
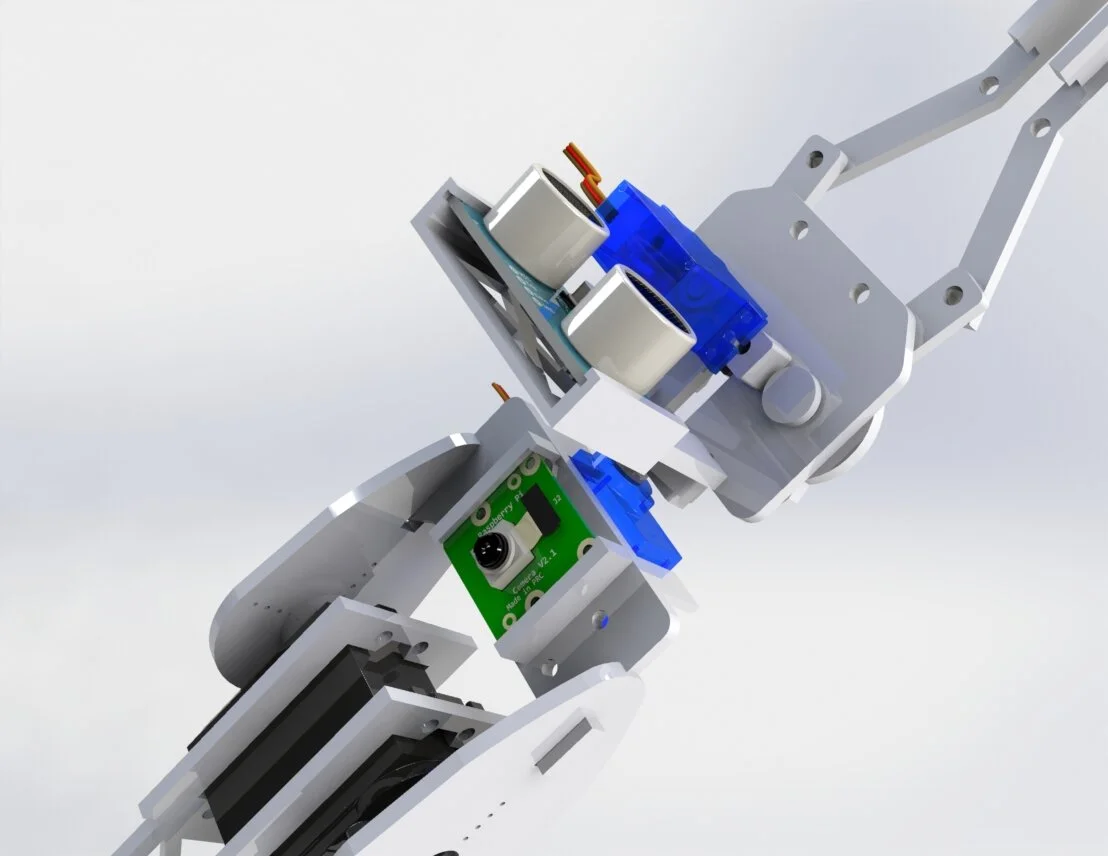
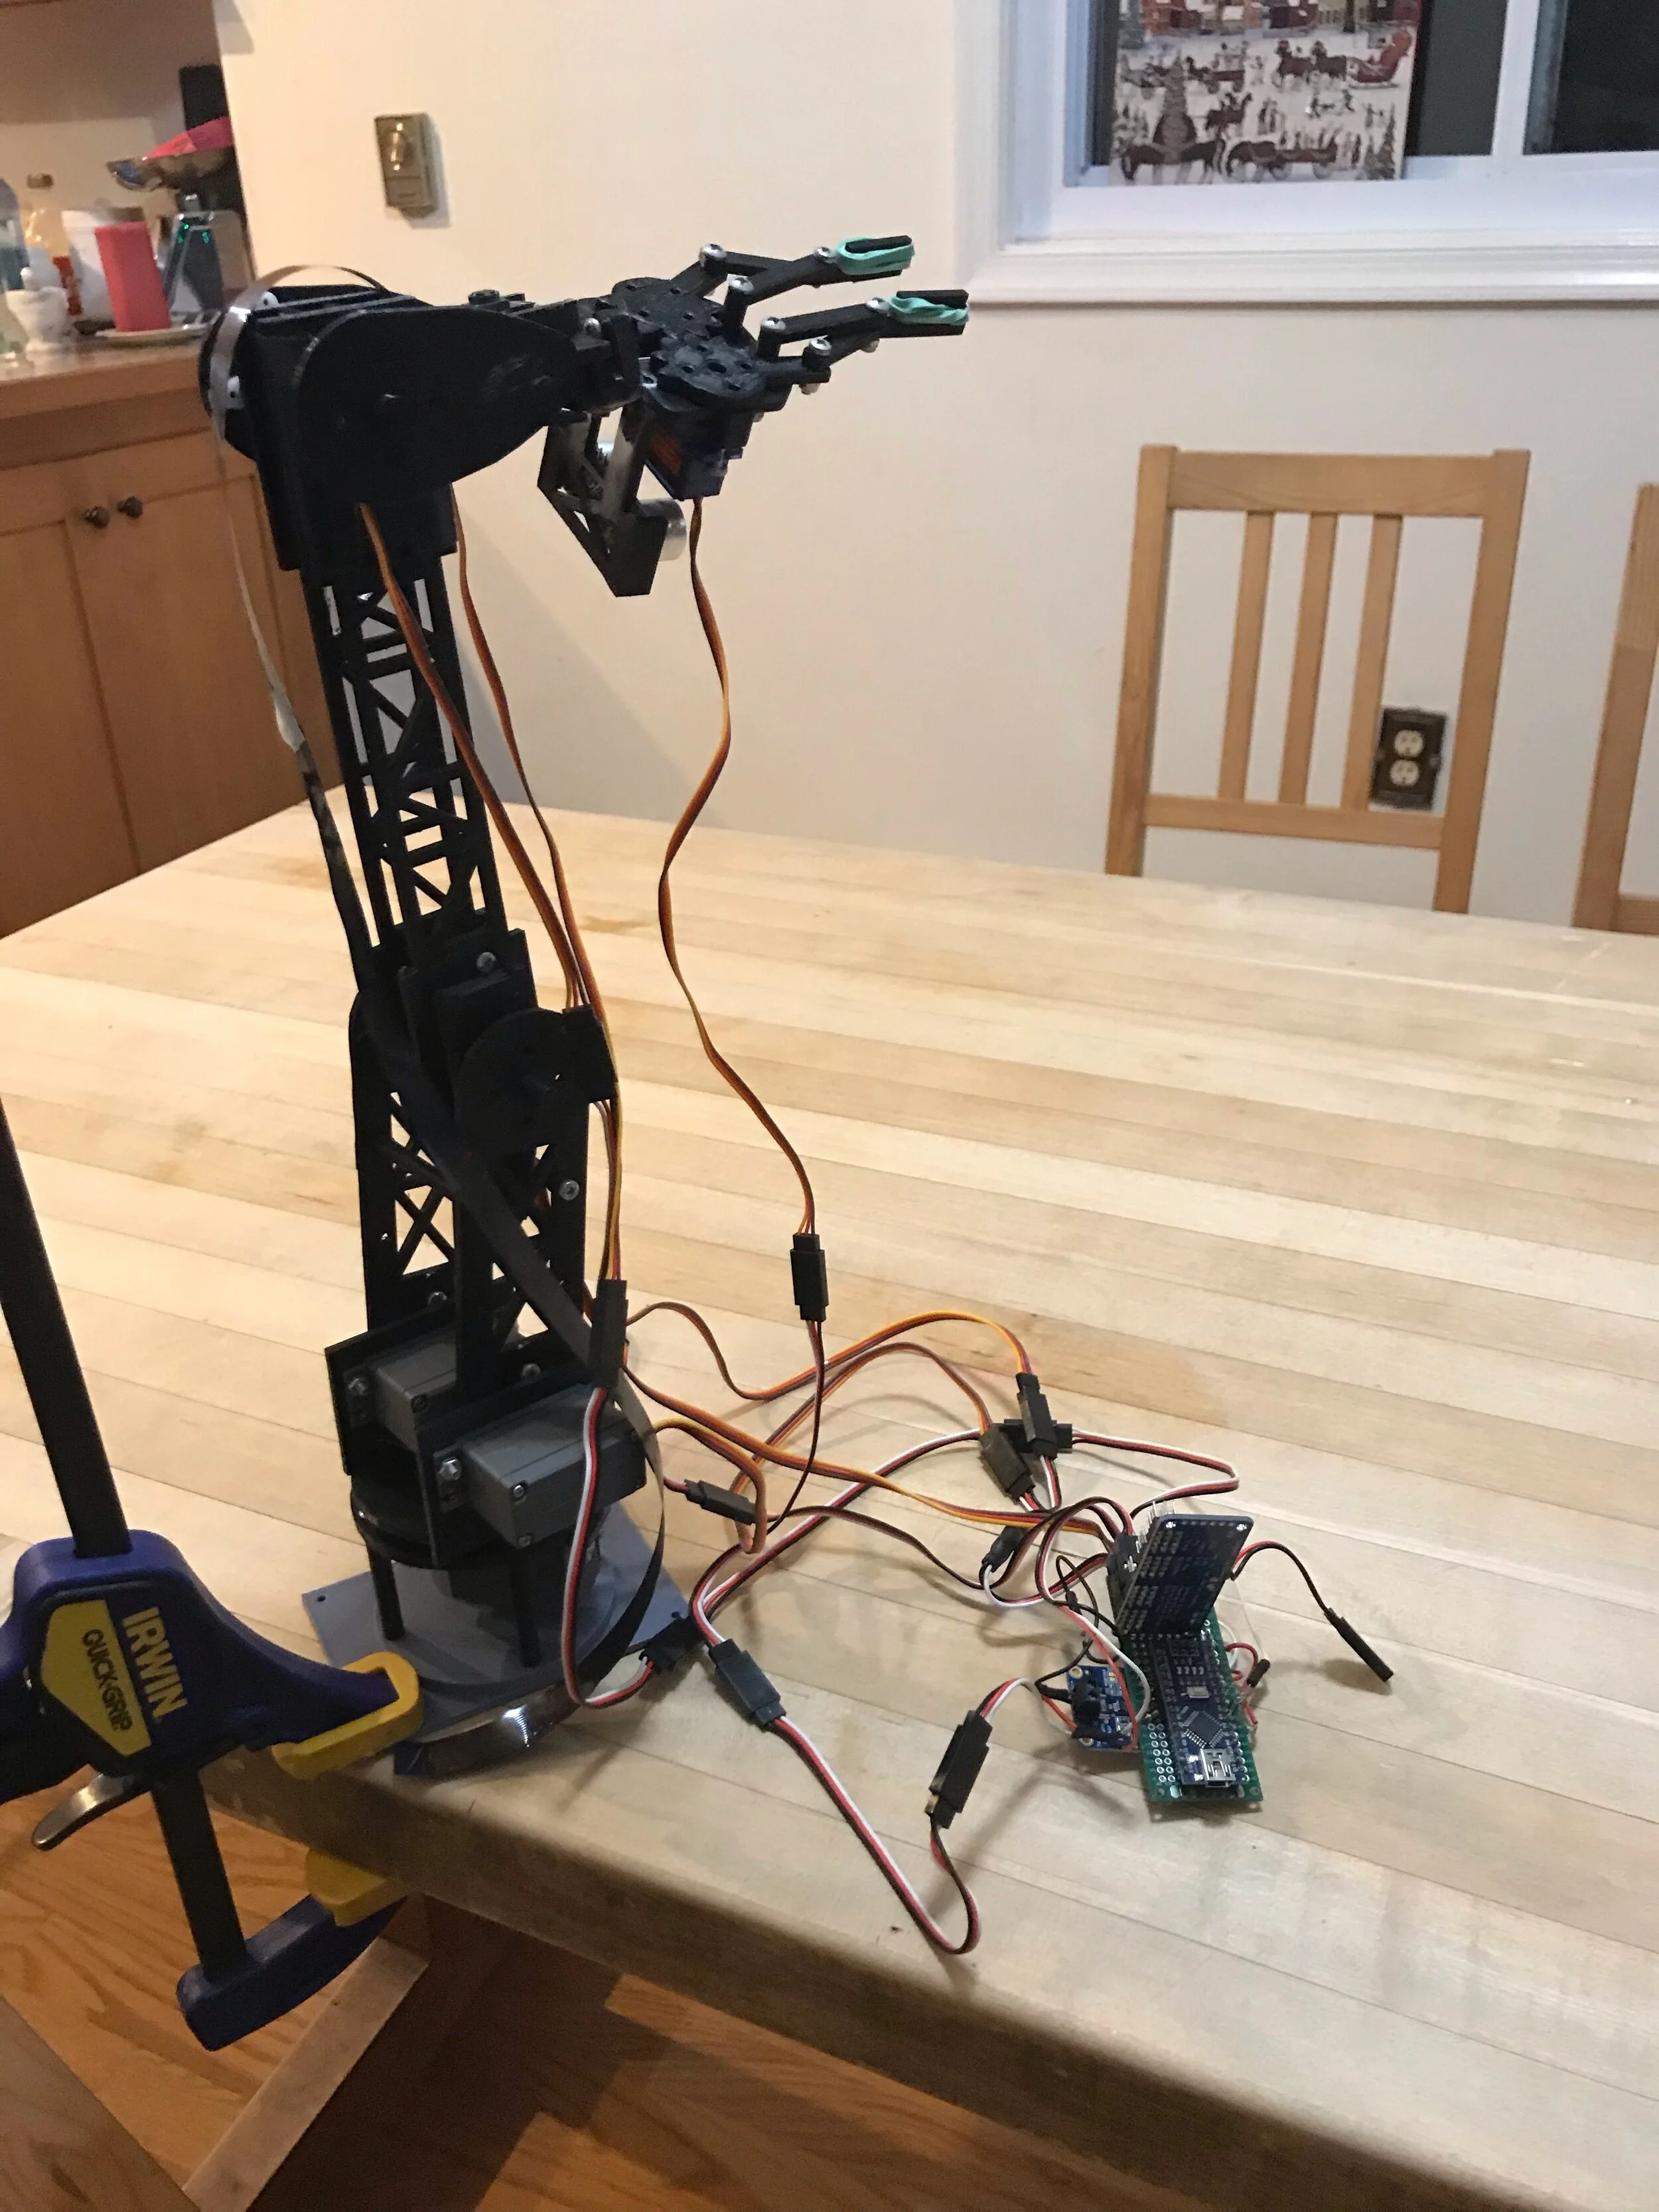
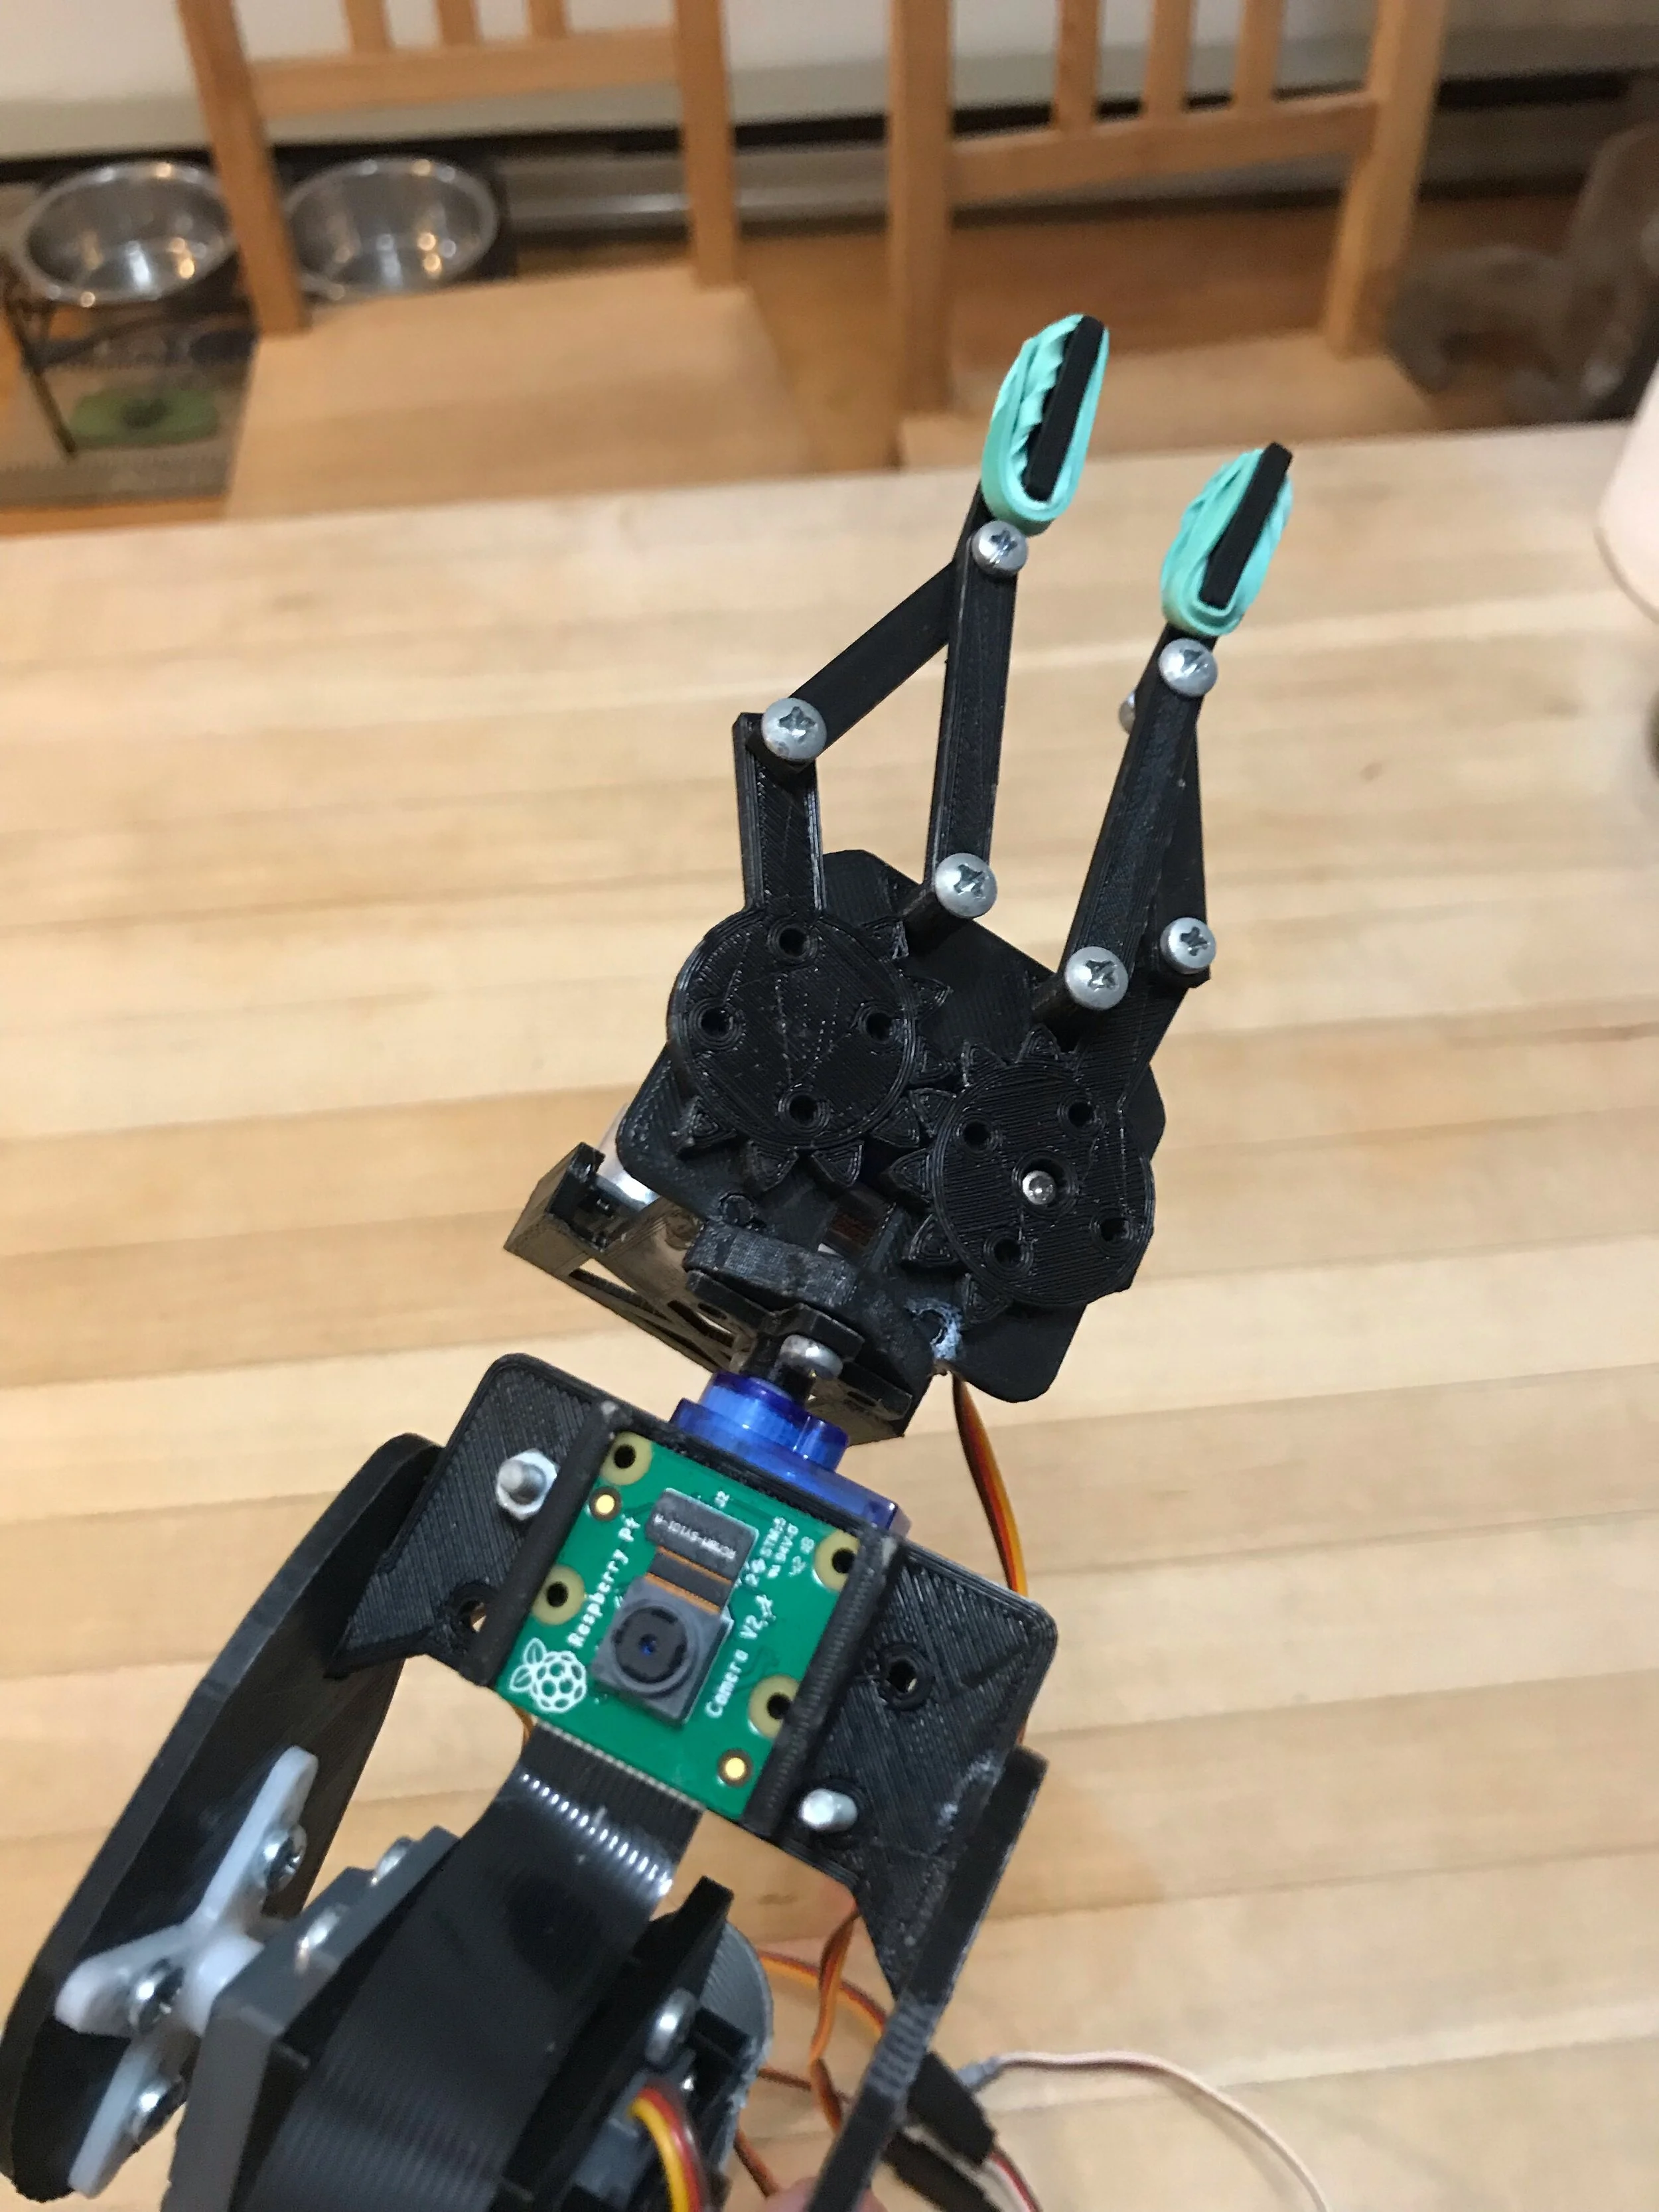
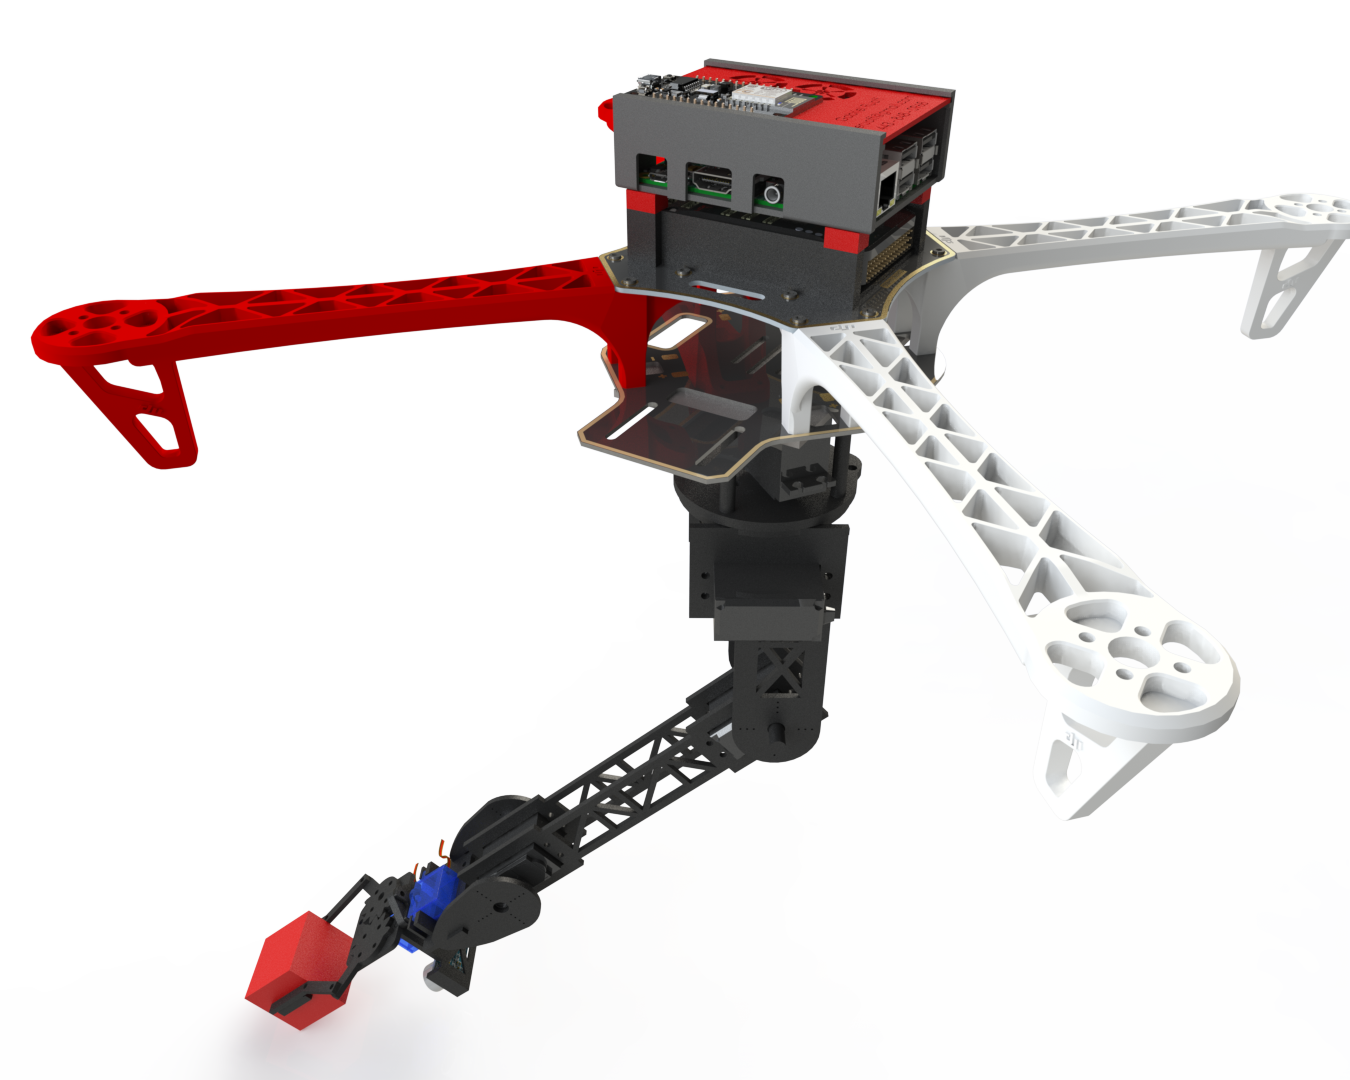
The robot arm contains 34 self-designed parts and is completely 3D printable with the exception of the electronics. Designed in Solidworks, it stands at just over half a meter tall and is actuated by 7 servos, giving it six degrees of freedom. It’s fitted with a raspberry pi camera and HC-06 ultrasonic sensor for autonomous object detection and retrieval. It can either be controlled programatically in java or python or can be switched into “manual” mode where it mirrors a user’s arm gestures using a leap motion controller. The entire arm costs only $95 to manufacture!
Controlling The Arm
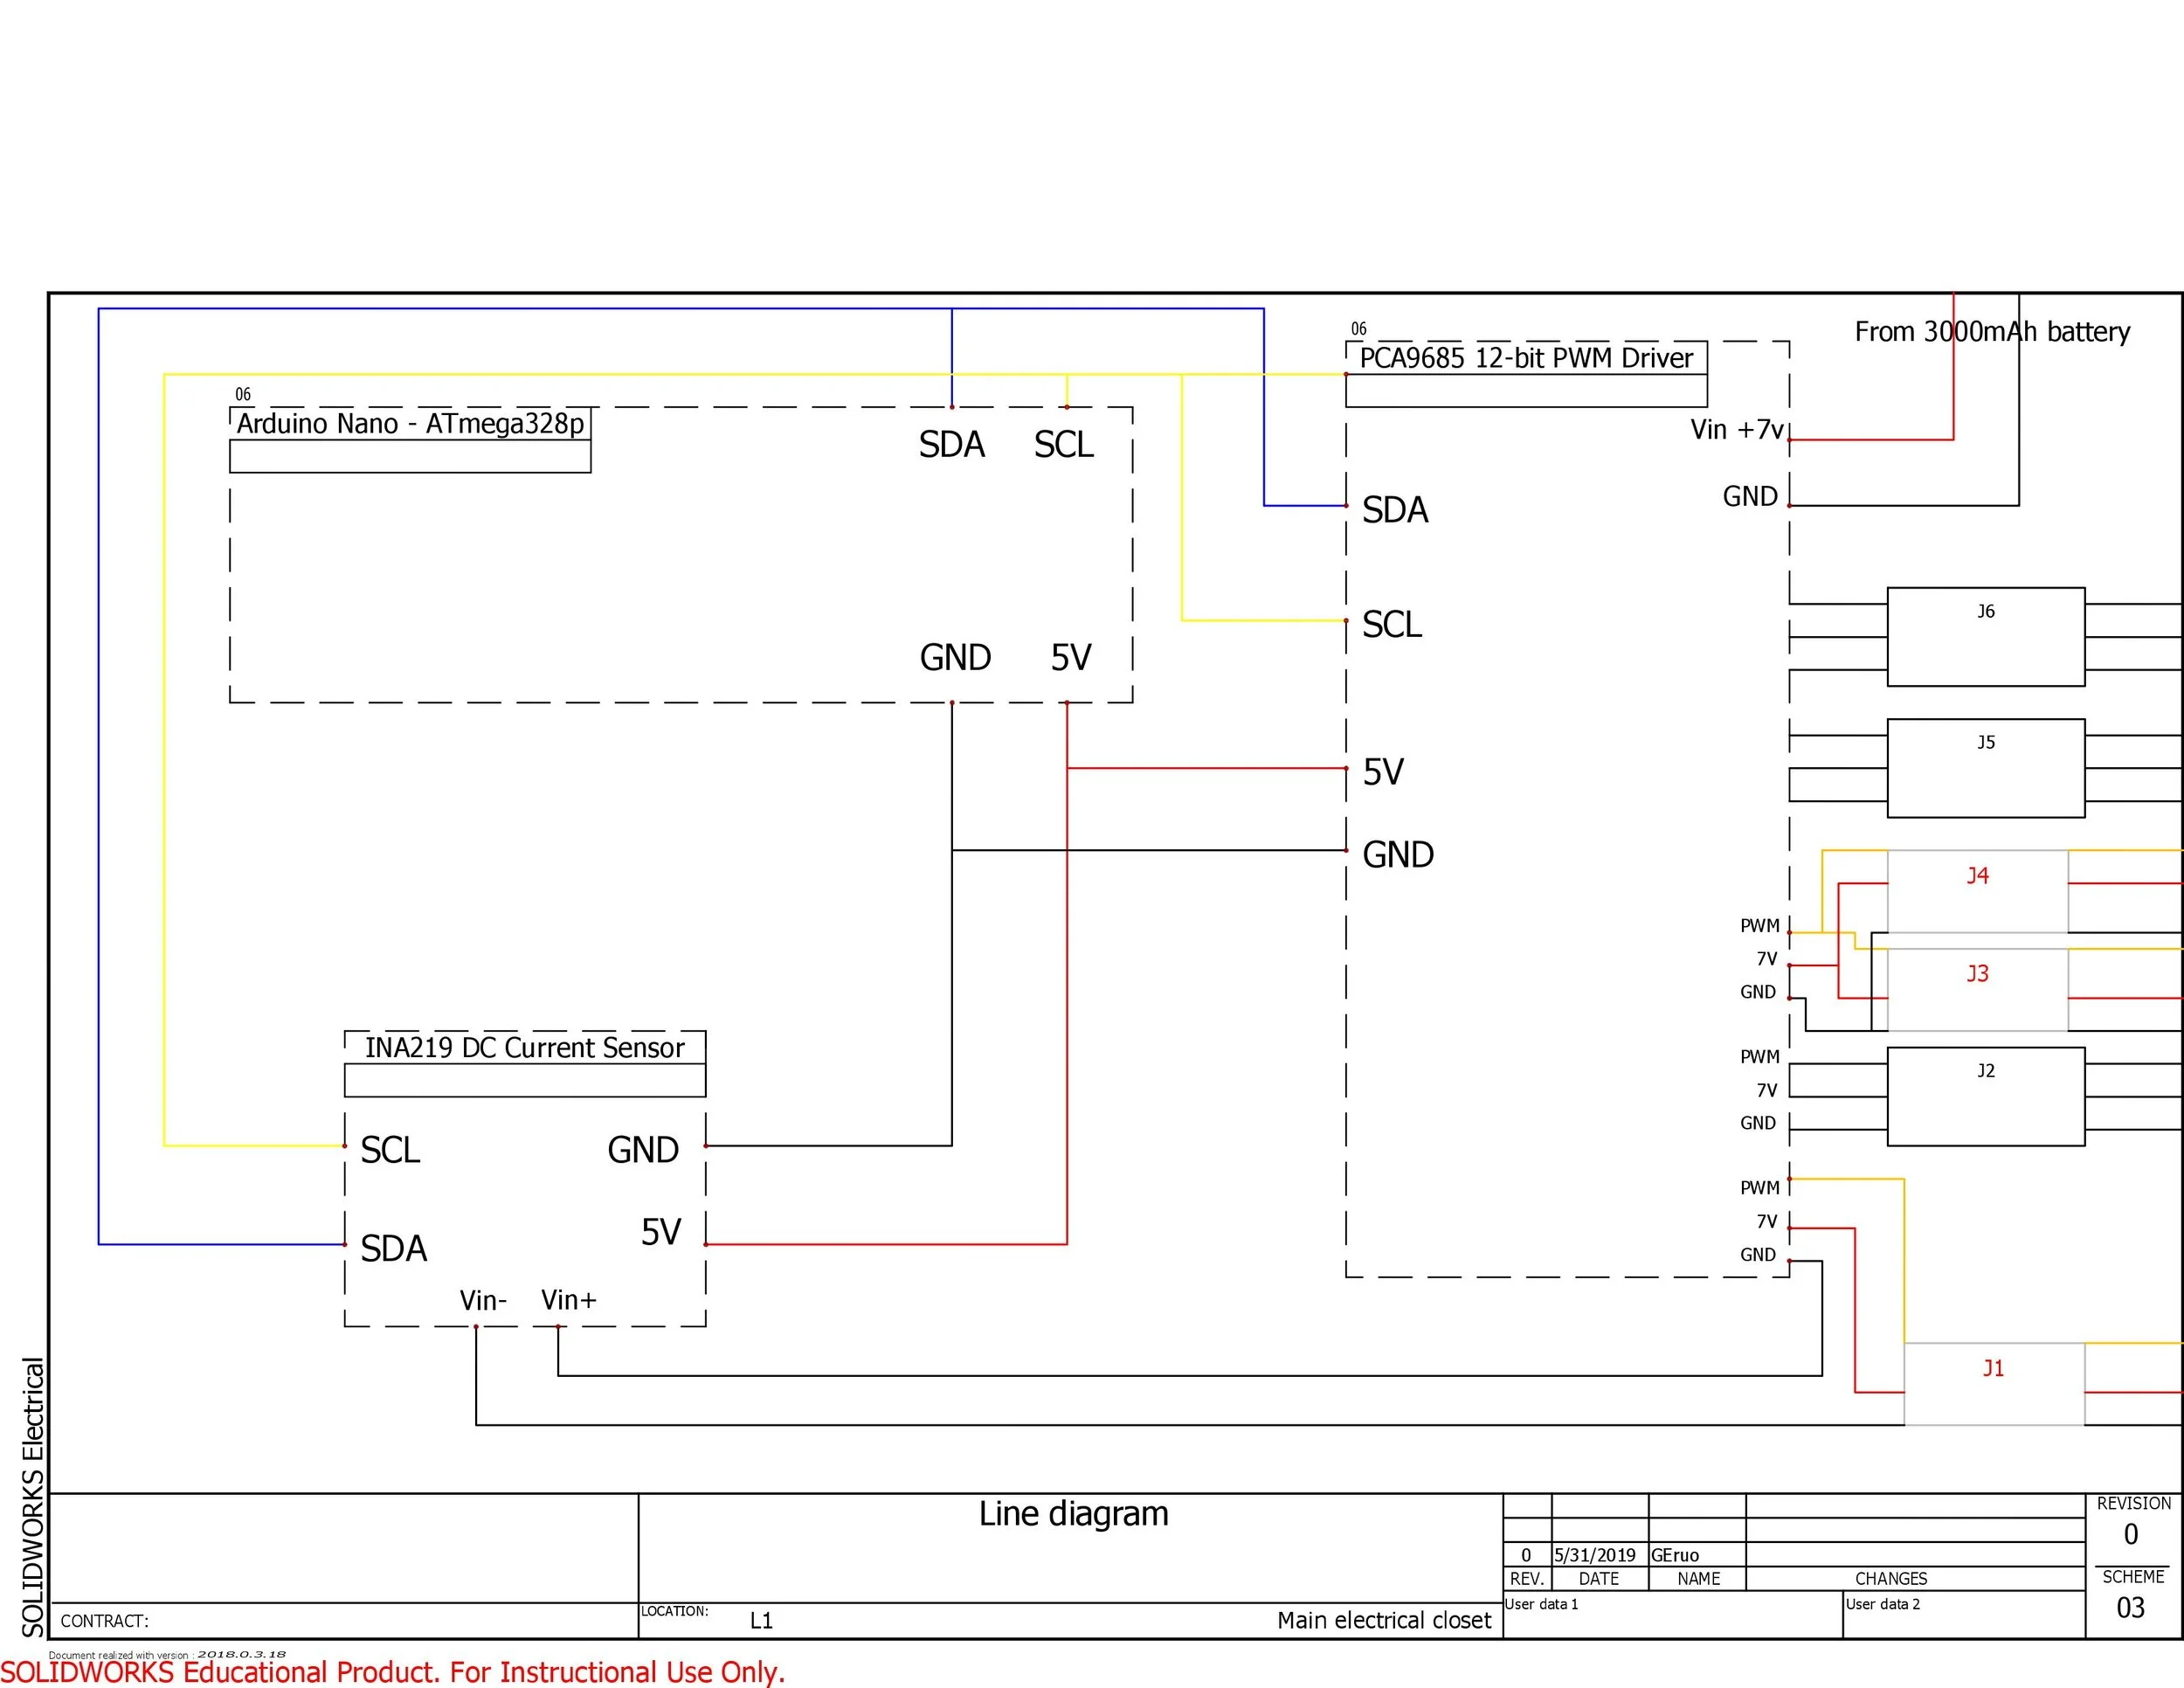
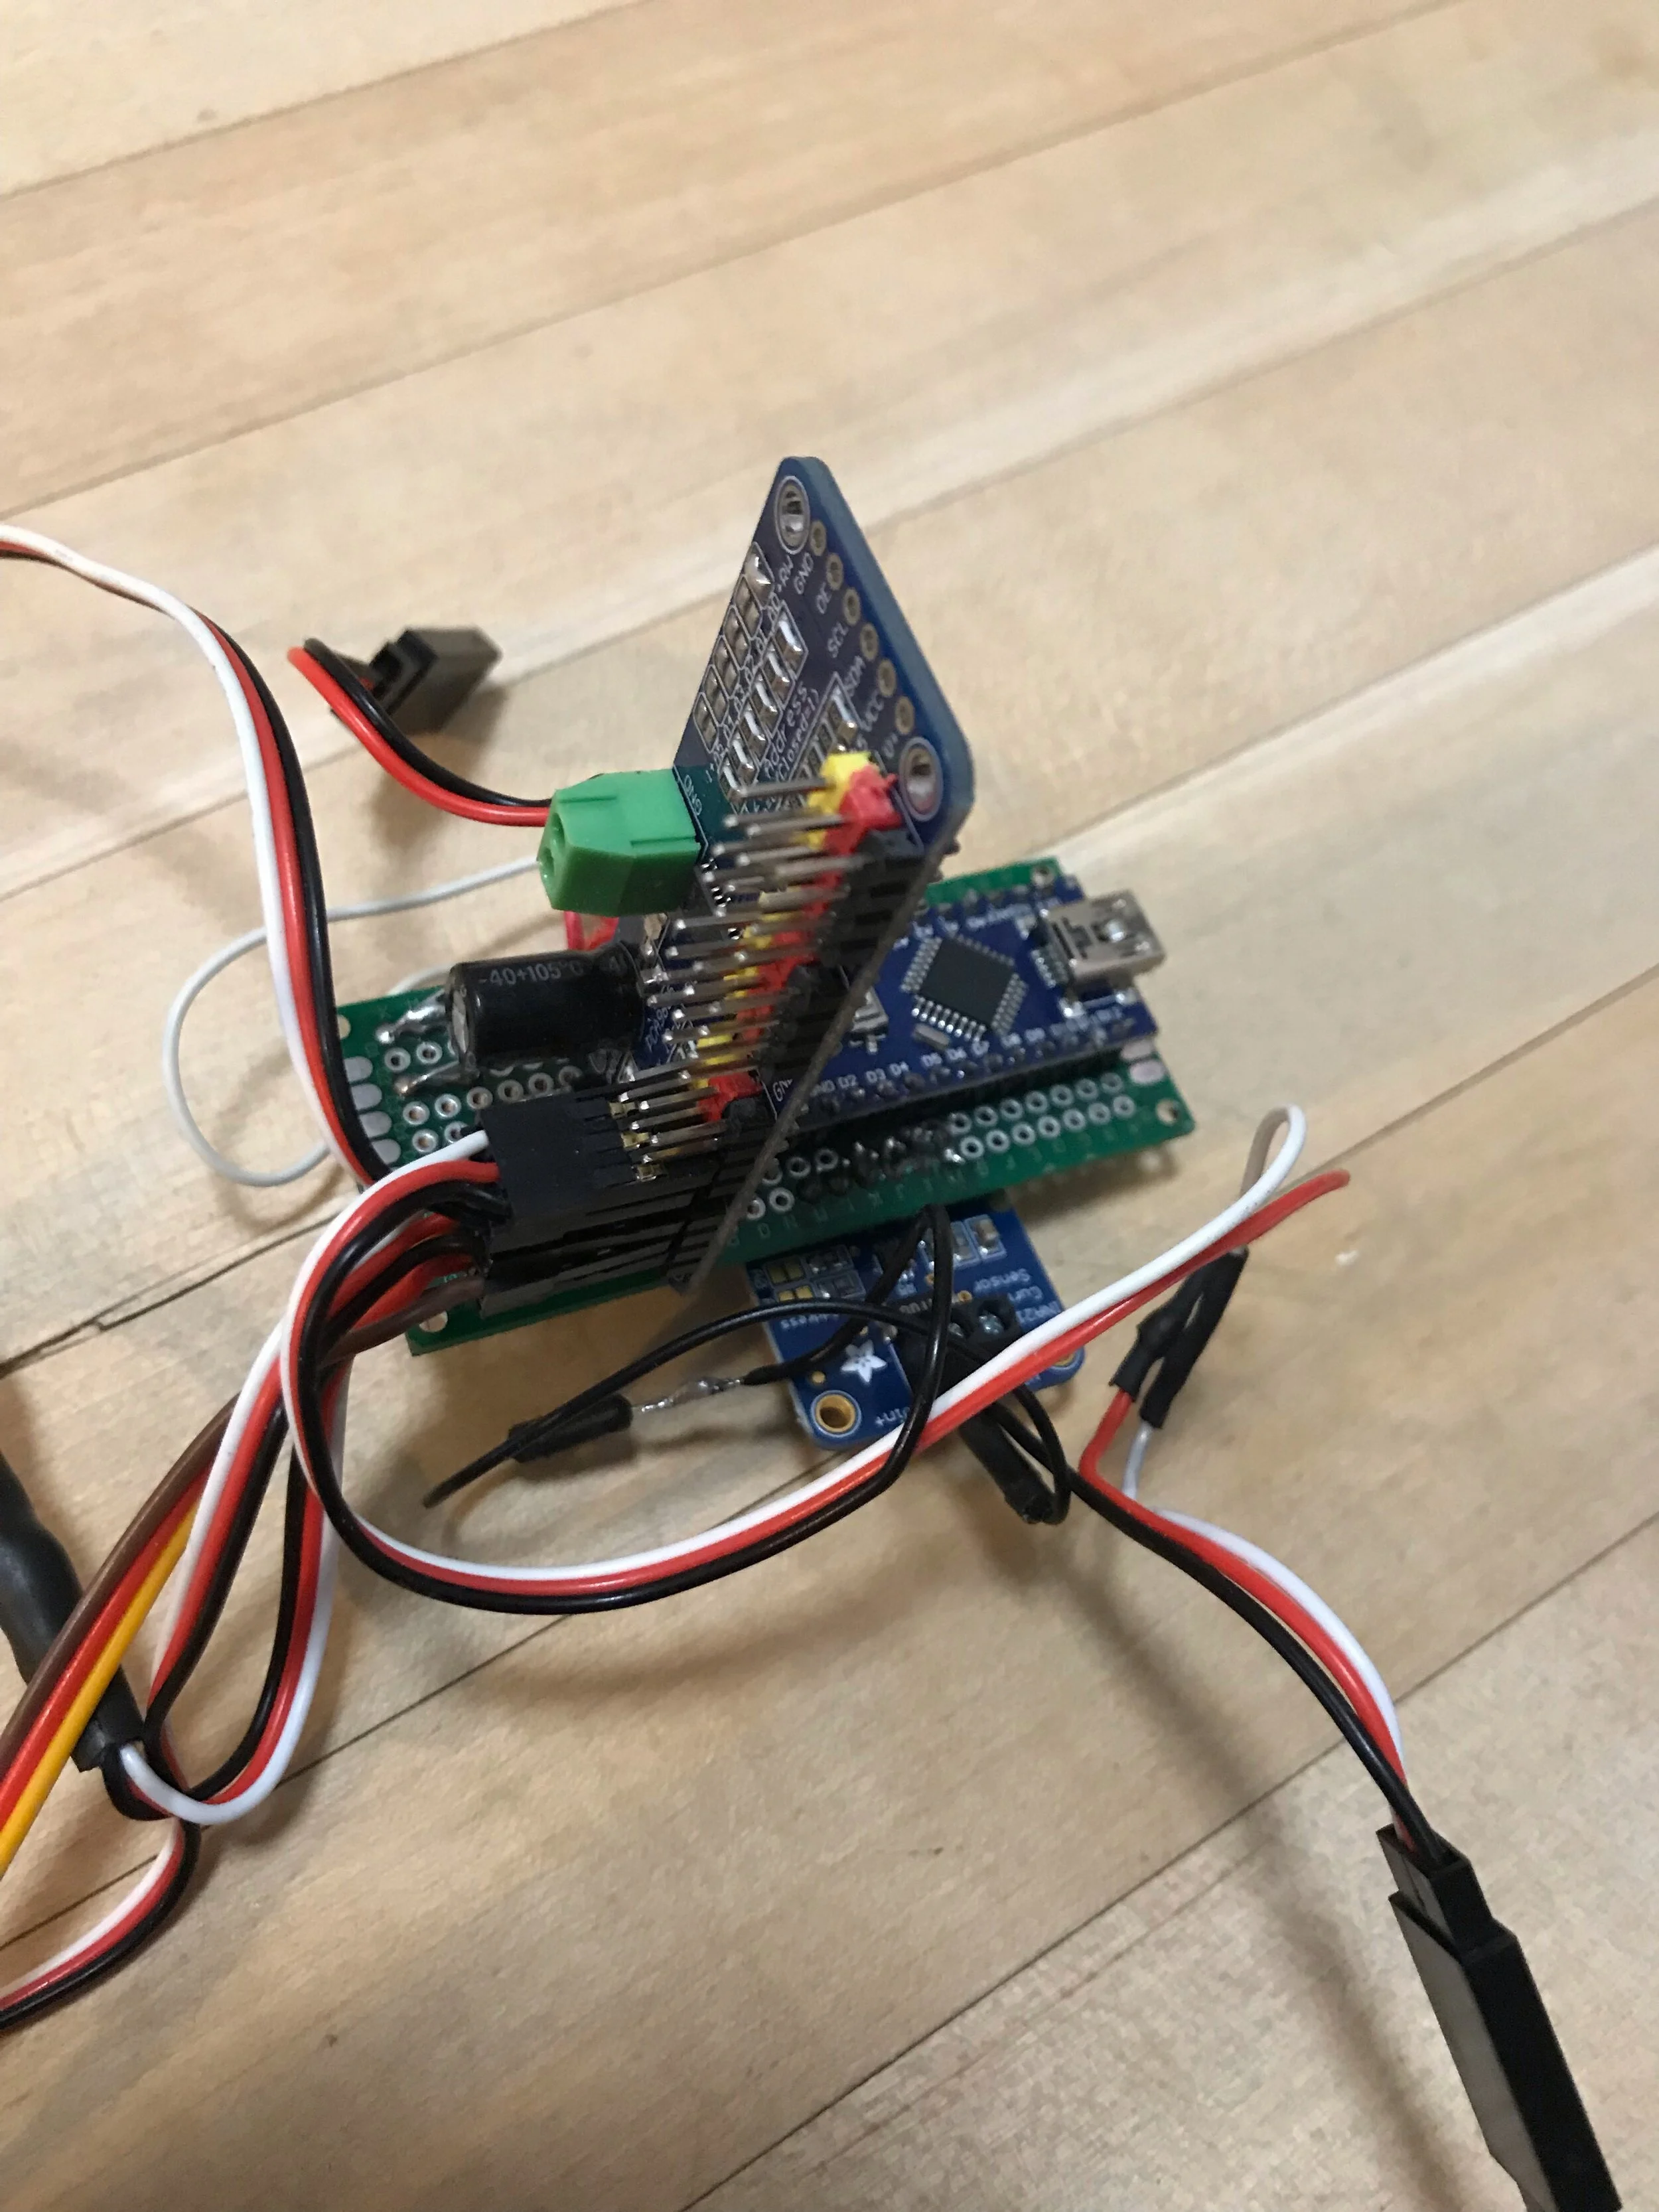
The arm is controlled by a driver chip consisting of an arduino nano, 16-port PWM controller, and Adafruit INA219 current sensor connected via the I2C protocol. The driver quickly parses input position information and outputs it to proper servos in order to change the angles of each joint. Through optimizing my arduino code, I was able to achieve an arm update rate of around 100Hz.
Major design challenge
One of the major challenges that I encountered while working on this project was preventing motor burnout on the robot arm’s grabber. Initially, I was having it grip objects by simple telling it to close, knowing that it would get stuck on the object and grip it. Though this worked very well, it put enormous strain on the delicate plastic gears inside the grabber’s motor, leading to frequently broken motors. To fix this, I placed an INA219 current sensor in the circuit with the grabber motor. By blocking the grabber with my hand and different points in its movement, I was able to determine a current threshold that corresponded to the grabber holding an object. Now, when the grabber detects an object in its grasp, it will grip it snugly before stopping in place to allow the motor to rest.
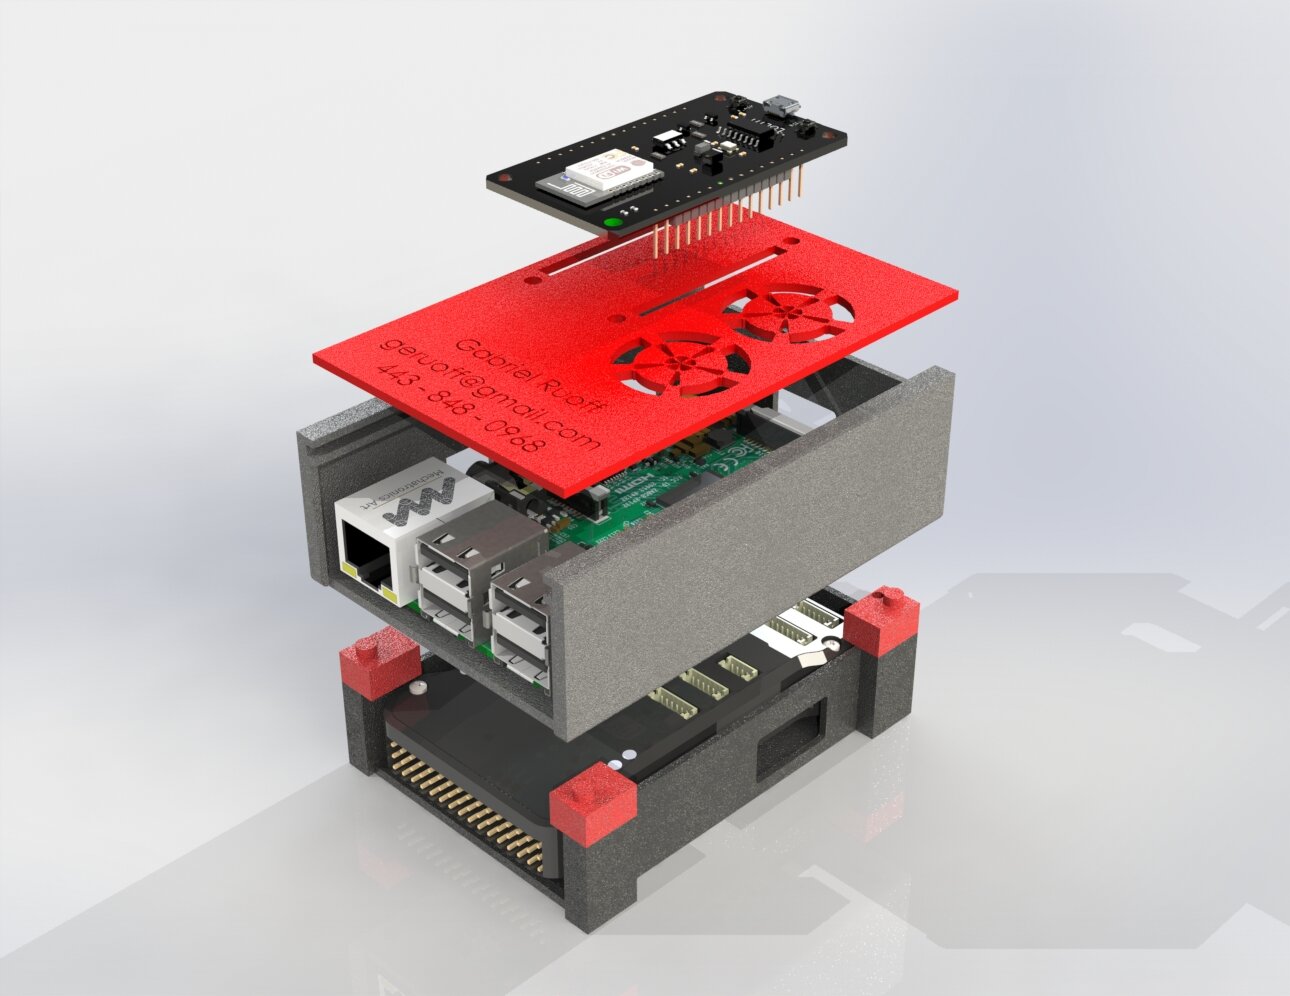
The Drone
For this project, I used a custom DJI flamewheel F450 drone that I built a few years ago. Scrapping its flight controller, I designed an electronics mounting tower and installed a Pixhawk 4 flashed with ArduPilot, a Raspberry Pi 3, and an esp8266 wifi module instead. The Pi processes data from the Pixhawk’s sensors and the arm’s onboard camera and feeds flight instructions back to the Pixhawk. The esp8266 module provides the groundstation (my laptop) with both a ssh connection to the Pi and live telemetry through the Pixhawk.

Controlling the Drone
In order to control the drone using the Raspberry Pi, I used the dronekit Python library which allows facilitates serial communication with ArduPilot devices using the Mavlink protocol. Using GPS and data from the onboard camera, I was able to write python code that would pilot the drone along its mission.
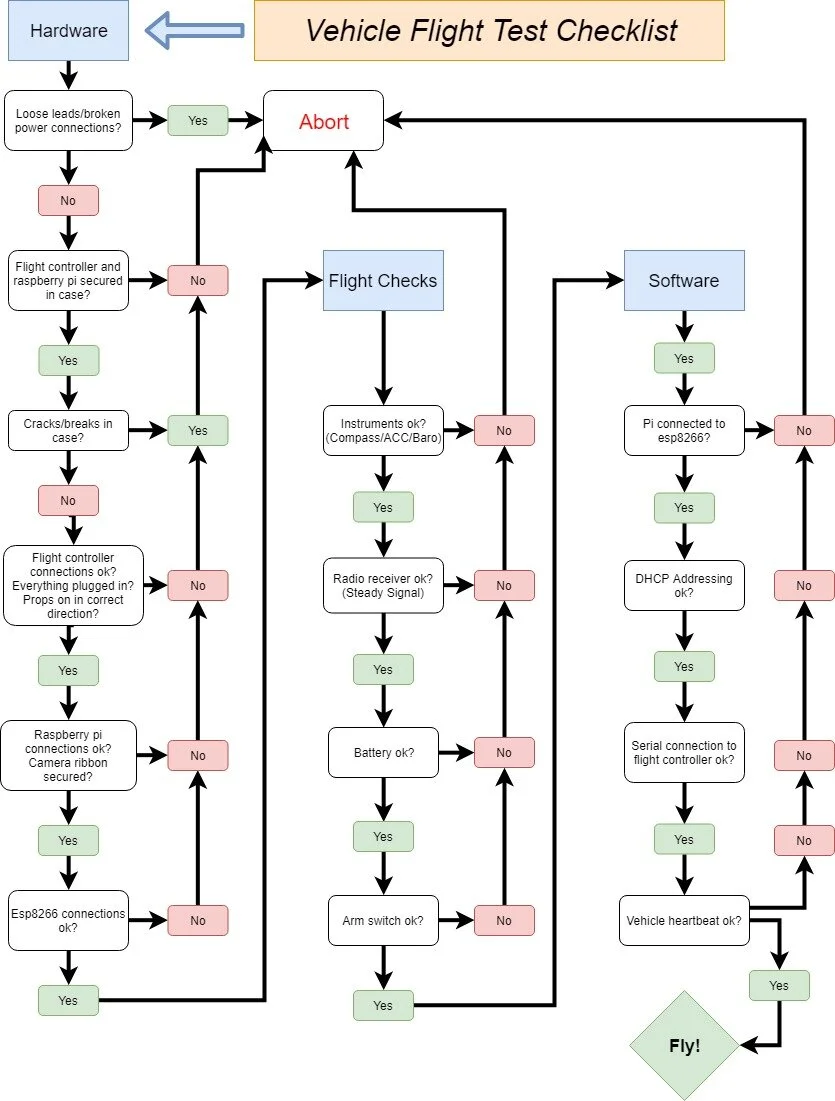
The Code
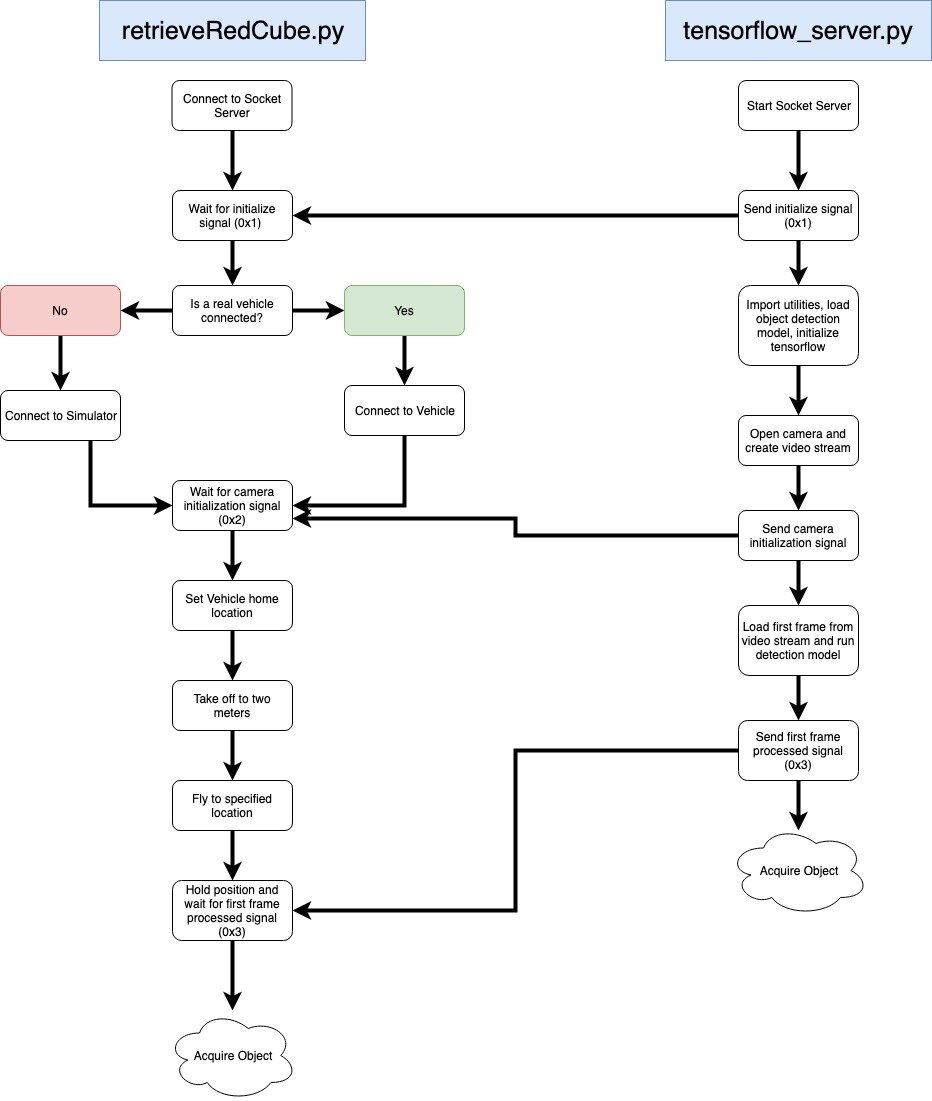
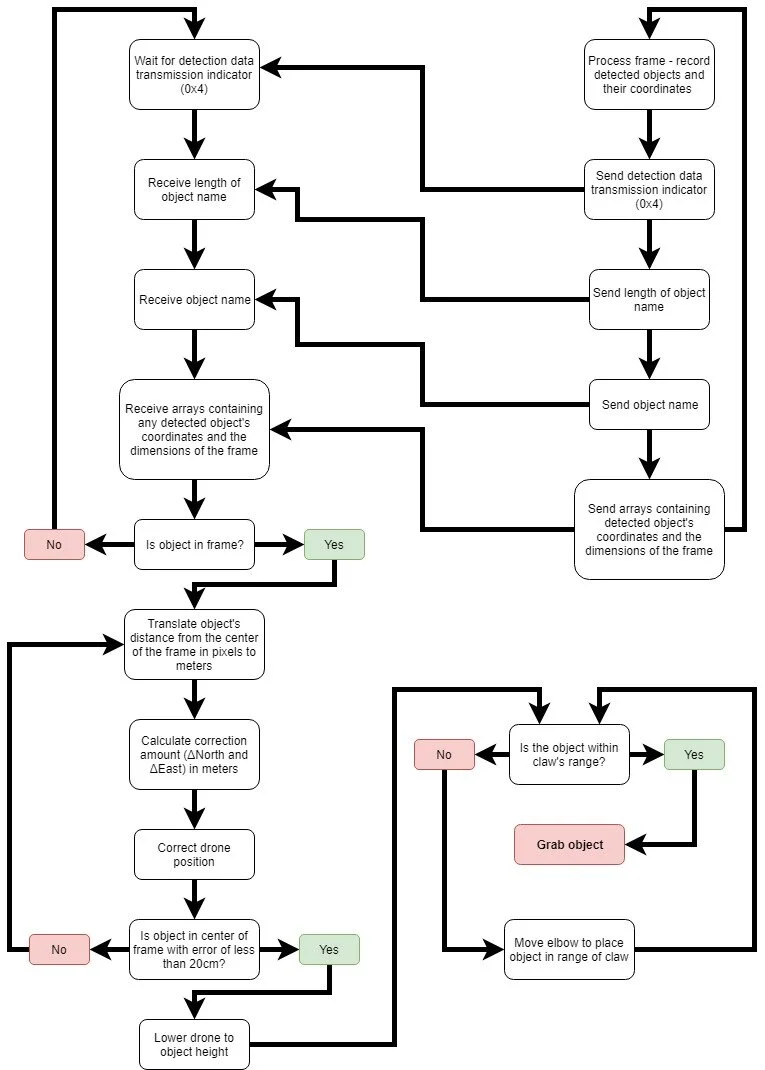
Writing code for this system was extremely hard, as tensorflow, the API I used for object detection is only compatible with Python 3, while dronekit was only compatible with Python 2 at the time (I was recently able to compile and install it for Python 3, so I believe they’re since added support). I solved this problem by using sockets to allow Python 2 and Python 3 scripts to talk to each other. I ended up with two parallel programs that follow the flow chart below:

Spin-off Project: RACP
In order to easily control the arm in either Java (used for manual mode) or Python (used for programmed control), I wrote libraries for the arm in both languages. Using the libraries, the code to control the arm ended up being so simple, however, that I had the idea to donate it, along with the arm’s STL files and a setup guide, to my school’s makerspace so that younger students could easily build and play with similar systems. I also published a similar version under the name RACP (Robotic Arm Control Protocol) on Github that can control any robot arm containing up to 16 servos using the same driver chip that I used for my arm.