Product Design: Simple Model Rocket
In order to explore the product development process, I decided to build a small, compact, and powerful model rocket complete with documentation, graphics, and cost analysis. My first step was to research similar products that were already on the market. Browsing through the Estes model rocket site, I noticed that beginner rockets such as the Firehawk could only reach 500ft or so, while more powerful rockets were more expensive and more difficult to assemble. Additionally, Estes rockets’ construction, with a glued, fixed diameter motor mount, does not allow for a motor replacement. From this cursory look around Estes’ website, I decided to design a product that could reach low, ‘park flyer’ altitudes, while also being able to stretch its legs on higher performance engines. Additionally, I wanted my product to have the form factor and ease of assembly of a ‘beginner’ rocket, such as the Firestreak SST or the aforementioned Firehawk.
Preliminary Design
First, I opened OpenRocket (OR) and sketched a rocket that could fly on either a C6 or A10T Estes motor. I needed each of these flight profiles to fit a certain apogee range (park flyer vs performance), with the vehicle maintaining stable flight in either configuration. Since this rocket does not contain electronics like the Data Logger V2, I was able to simply create a PLA material profile in OR and specify the wall thicknesses, fin profiles, body densities, etc… in order to accurately model the rocket’s weight distribution. I ended up with this profile, which I then modeled in SolidWorks (SW):
Dart modeled in OR
Dart Modeled in SW
Assembly
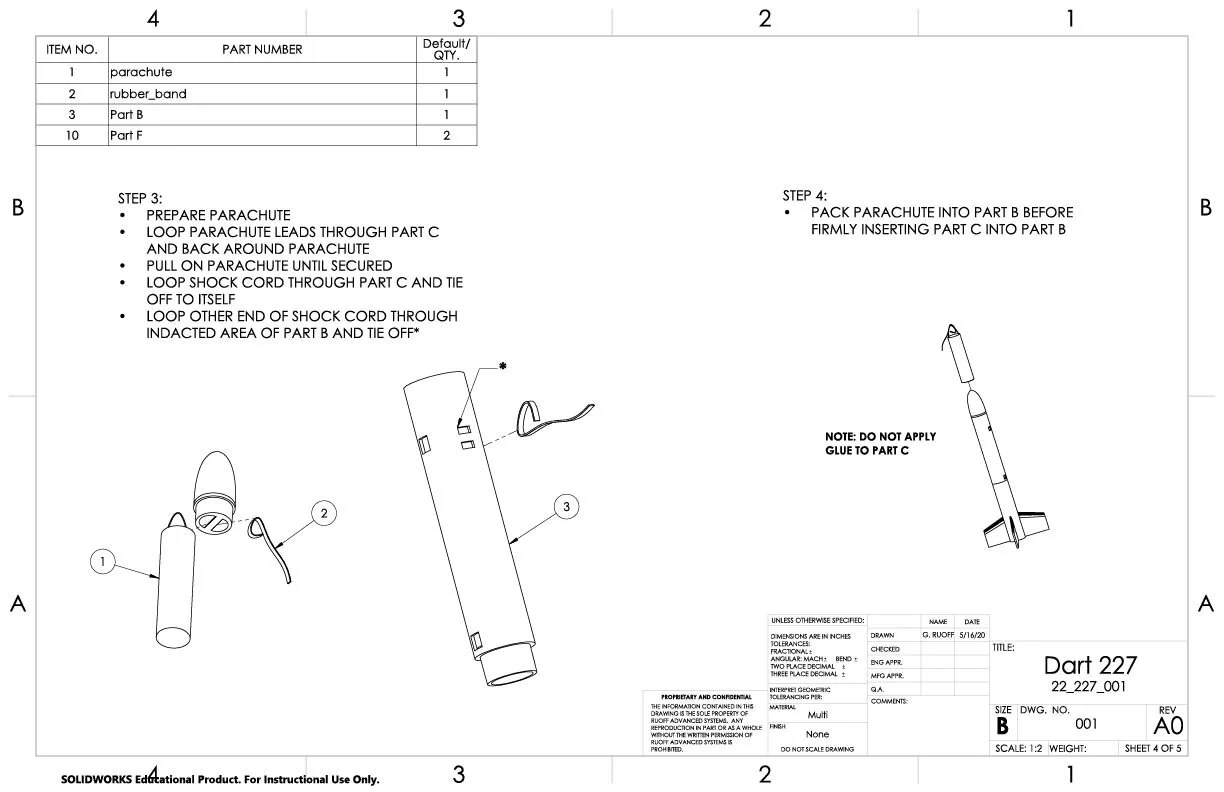
In order to fly a model rocket, an end user has to first assemble it. I used the model that I had created in Solidworks to create detailed assembly instructions for this rocket. Now, they will undoubtedly have to be updated at some point in the future, however generating an initial revision at least conveys the intent and function of my design and serves as a template for further revisions.
These assembly drawings can be seen below:


First Flight
As this rocket is very cheap and easy to produce and fly, I’m focusing more on experimental testing during this project. Additionally, having hands-on experience with my product helps me to identify end-user problems or potential improvements. After running through design checks in SW, revising some connector fits, and playing with the fuselage wall thicknesses, it was time for this rocket’s first launch!
I decided to test the rocket’s C motor configuration first because I currently only have C and E motors at my house and the store is closed due to COVID-19.
Unlike my larger rockets, Dart is launched with a simple, switch controlled time-delay launcher. It features the same 15 second countdown as the radio-controlled version, including a buzzer and LEDs.